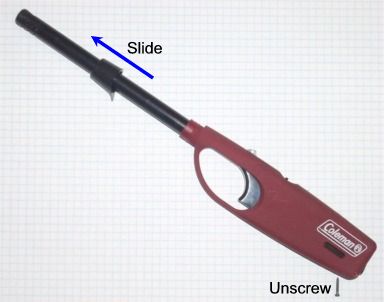
Starting with a long-tipped fireplace lighter. These are usually available for $5 to $15 at hardware stores. This particular lighter came in a set of three for $20.
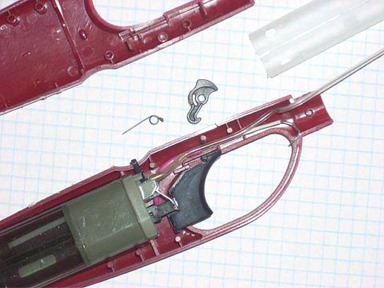
To open the lighter you have to remove one or more small screws that hold the case together. You also have to slide off a metal or plastic ring located at the junction between the lighter body and the long tube.
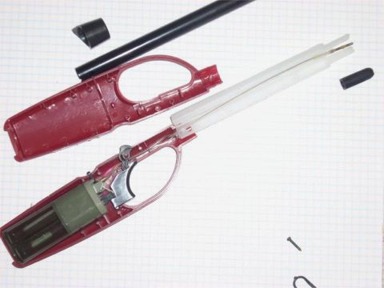
Slide the ring all the way off the tube. Carefully pry the case open. There is likely to be a few loose parts and a spring or two so open the case slowly so you don't loose anything. In the photo the case is open and the metal barrel has been removed. This particular lighter had a separate plastic barrel lining with a black cap that I've opened up. One of the electrical contacts for the piezo sparker is a thin wire that runs inside the gas supply tube.
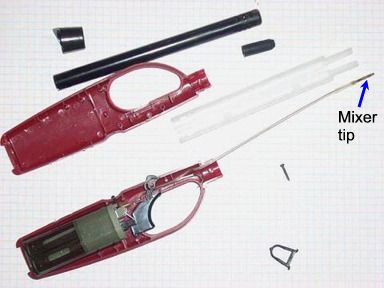
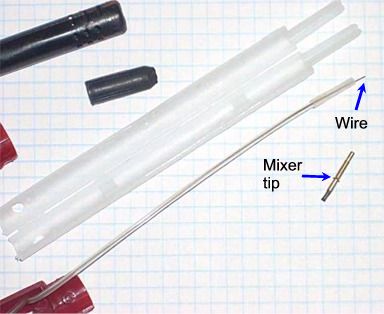
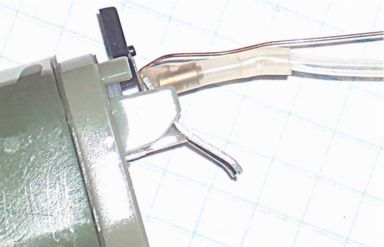
With the barrel liner removed you can disconnect the air mixer (a small metal tube that ends with a spring) from the end of the gas supply line. The mixer tip contacts the wire in the fuel hose and is one of the two electrodes for the spark gap. The other spark gap electrode is the metal tube.
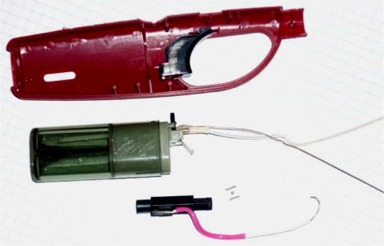
The safety interlock switch is pulled out and discarded. The plastic barrel liner is also discarded.
Here is a close-up of the trigger, gas valve and top of the piezo. Pulling the lighter's trigger opens the gas valve (via the gas valve arm) and also compresses the piezo, which creates the ignition spark.
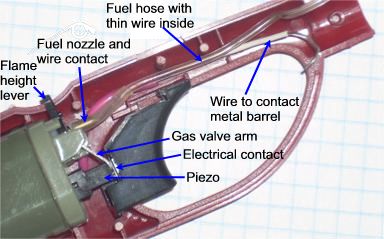
Carefully remove the lighter from the case keeping track of any small parts or springs, especially for the trigger. This particular lighter uses the gas valve arm as part of the electrical path. A small metal cap sits between the trigger and the top of the piezo and transfers the high voltage (HV) from the piezo to the gas valve. The small wire in the gas supply tube transfers the HV from the gas valve to the tip of the lighter. Other lighters will just run an insulated wire from the piezo up the barrel to the tip. The other HV connection to the lighter tip is the metal outer tube, which connects to the wire with the purple and white insulation which in turn is soldered to the side of the piezo.
For this lighter, I pulled the gas supply hose off and pulled the wire out of it. I then bent a hook in the end of the wire, slipped the hook into the end of the tubing and pushed the tubing back onto the lighter's nozzle. In the lower photo you can just barely see the end of the copper wire wedged inside the tubing and pressing against the yellowish colored metal fuel nozzle. Make sure that the wire does not reach the full length of the fuel nozzle, if it does then the hose will leak.
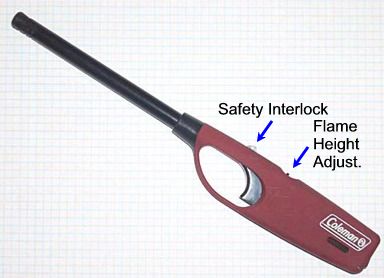
While the lighter case is open you may want to increase the flow rate of the valve by repositioning the flame height adjuster. Set the adjuster for the maximum flame height then lift the adjuster arm up and off the knurled top of the fuel valve. Rotate the adjuster as far as possible towards the minimum flame height position then reinstall it on the knurled nut.
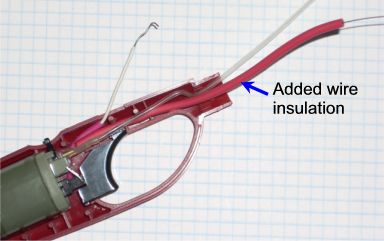
I rerouted the HV wire that was connected to the barrel up through the hole where the safety interlock button was located. The gas supply tube and the other wire (which is uninsulated in this lighter) were routed out the hole where the barrel was located. I slipped a piece of insulation from 20G wire over the bare wire.
The case was closed up and the screw and collar were reinstalled to hold it all together. I injected a glob of hot melt glue into the end of the lighter to hold the wire and fuel hose in place. Be careful though, hotmelt glue may melt the fuel hose.
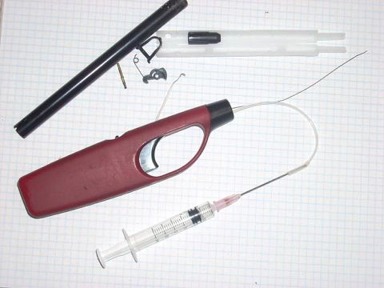
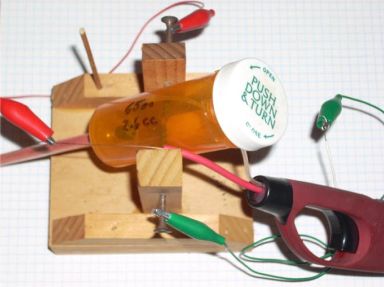
You can now connect the two wires to the spark gap of your spudgun. The photo shows the lighter wired to a combustion mini-spudgun using wires with alligator clips on each end. The fuel hose is just slipped under the cap which is just resting on the bottle.
This particular lighter creates a spark that can jump a two to three mm gap between sharp points. You need to keep the two wires well separated since they are poorly insulated. You can increase the insulation with tape, heat shrink tubing, or by replacing with wire that has better insulation. I added the insulation from a piece of 20G wire.
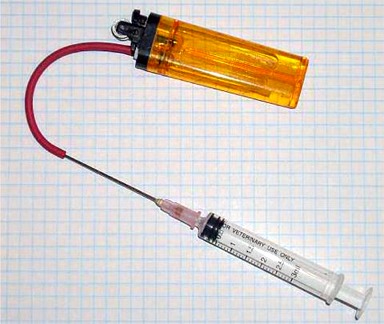
The gas supply tube could be permanently glued into a small hole in a gun's chamber.
Pull and hold the lighter's trigger to deliver the butane. Release the trigger, invert the gun a few times to mix the fuel (or use a chamber fan) then pull the trigger again to generate the ignition spark. For butane you want 3.7% (by volume) propane in the chamber.